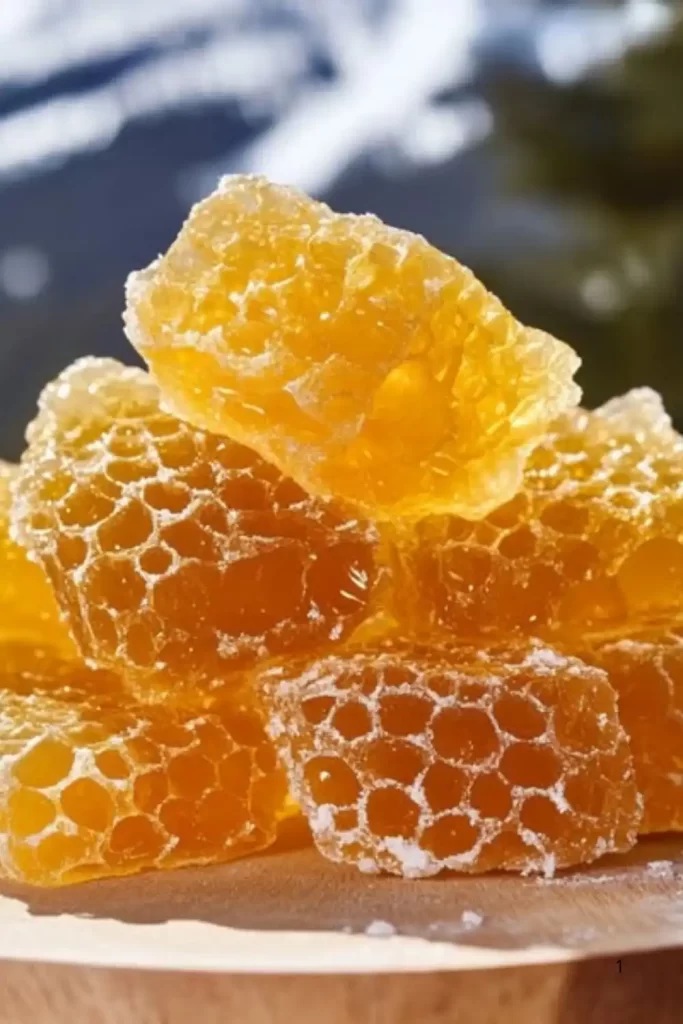
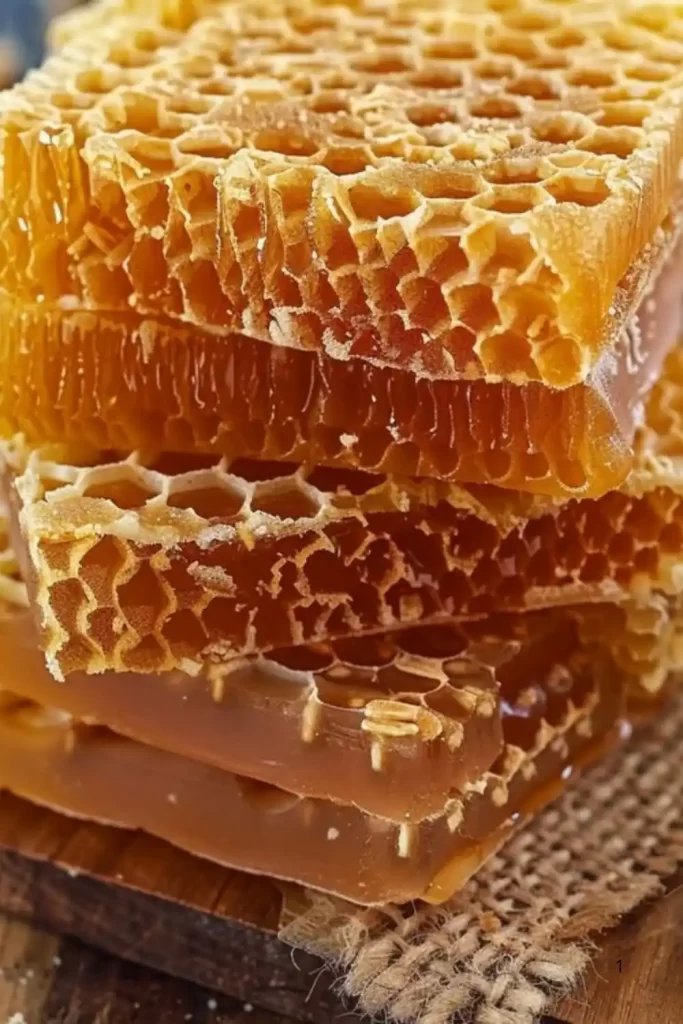
Honeycomb Candy Recipe
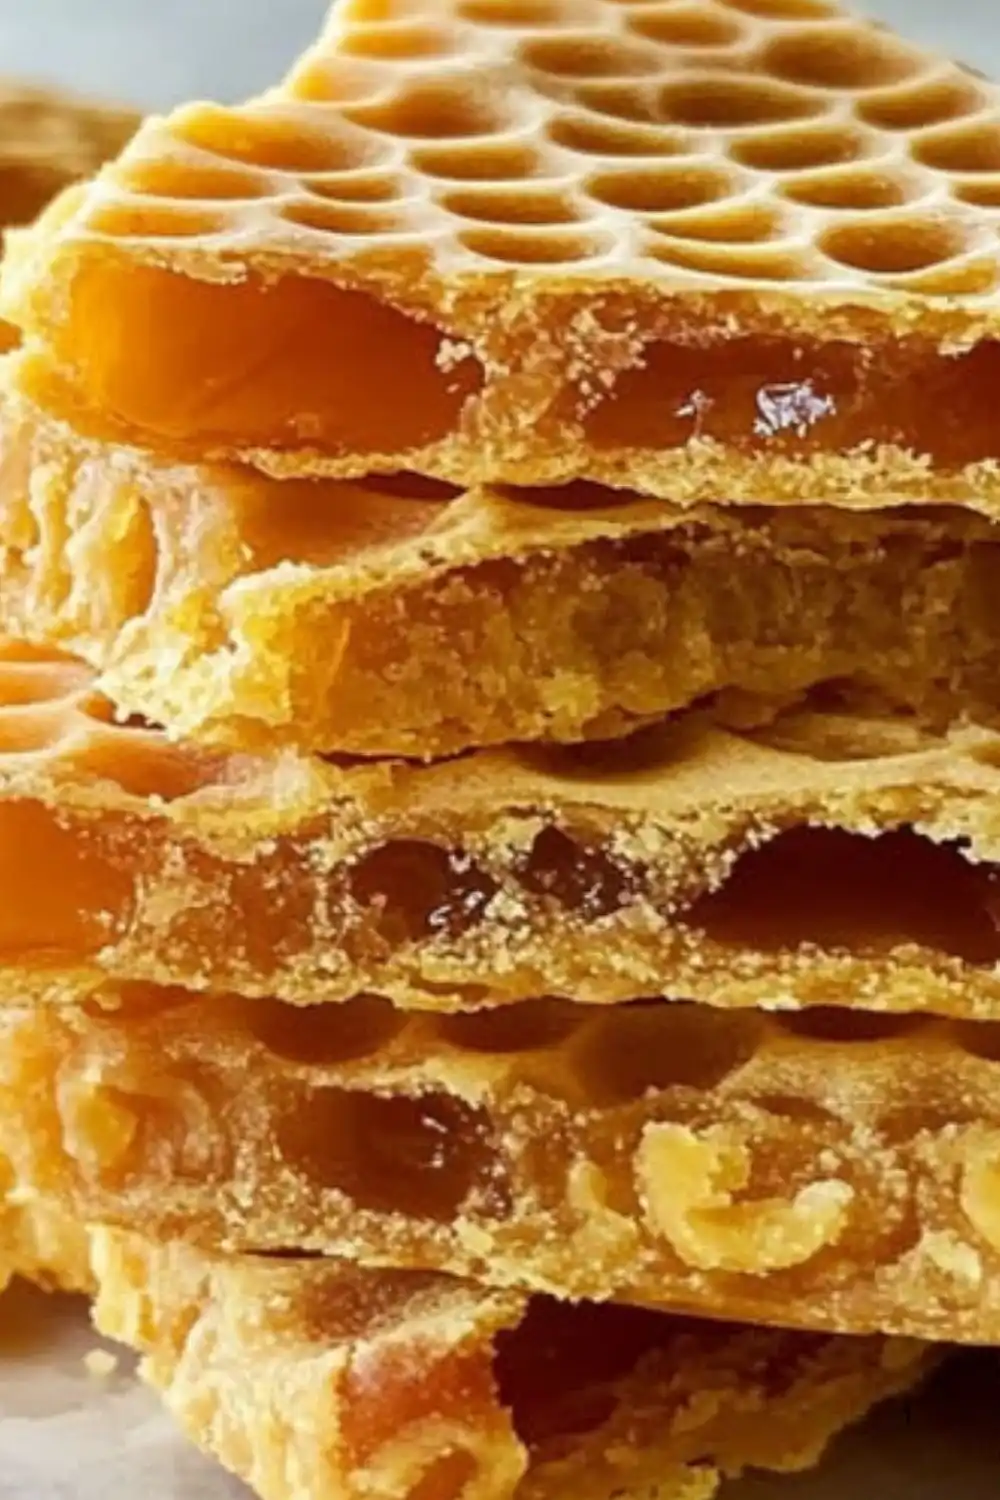
Honeycomb candy, also known as sponge toffee, cinder toffee, or seafoam candy, is a nostalgic, crunchy confection that never fails to delight. With its light, airy texture and caramelized flavor, this treat is a favorite in candy shops, holiday tins, and even as a gourmet dessert topping. What’s truly magical about honeycomb candy is how a few simple ingredients sugar, corn syrup, and baking soda can transform into something so whimsical and delicious.
Popular in countries like the UK (as “cinder toffee”), New Zealand (as part of “Crunchie” bars), and the United States, this candy gets its name from its signature airy, porous structure resembling honeycomb. The recipe relies on a fun bit of kitchen chemistry baking soda reacts with hot caramel to form bubbles that get trapped as the mixture hardens. The result? A crunchy, golden treat that shatters delightfully with every bite.
Whether you’re making it for a holiday gift, a fun science experiment with kids, or simply to indulge your sweet tooth, this honeycomb candy recipe is a perfect project. Let’s dive into the equipment, ingredients, and step-by-step instructions to ensure your candy comes out flawless every time.
🍽️ Recipe Preparation Equipment
Before you begin, make sure you have the right tools to safely and efficiently create your honeycomb candy:
- Heavy-bottom saucepan (2-3 quart)
- Candy thermometer
- Silicone spatula or wooden spoon
- Baking sheet
- Parchment paper or silicone baking mat
- Measuring cups and spoons
- Whisk (optional)
- Heat-resistant gloves or oven mitts
- Knife or mallet (for breaking the hardened candy)
Having everything ready before you start is crucial this candy cooks quickly and requires immediate action once it reaches the right temperature.
🧂 What Do You Need to Prepare Honeycomb Candy?
The ingredients list is short and sweet, which makes this candy even more appealing:
- 1 cup granulated sugar
- ¼ cup light corn syrup (or golden syrup)
- 2 tablespoons water
- 1½ teaspoons baking soda (sifted for best results)
- Optional: ½ teaspoon vanilla extract or a pinch of salt
That’s it! These pantry staples come together to create a crunchy, foamy, and delicious honeycomb candy.
👩🍳 How to Make Easy Honeycomb Candy Recipe ? Step-by-Step Instructions
Let’s break it down in clear, manageable steps to ensure your honeycomb candy turns out perfect:
Step 1: Line Your Pan
Start by lining a baking sheet with parchment paper or a silicone baking mat. Set it aside but keep it close, as you’ll need to act fast once the candy is ready.
Step 2: Heat Sugar, Syrup & Water
In a heavy-bottom saucepan, combine sugar, corn syrup, and water. Stir gently until the sugar is moistened. Place over medium heat and stop stirring once the sugar has dissolved.
Allow the mixture to boil until it reaches 300°F (hard crack stage) on a candy thermometer. This usually takes about 5–10 minutes. Keep a close eye to prevent burning.
Step 3: Add Baking Soda
Once the mixture hits 300°F, immediately remove it from heat. Quickly and carefully whisk in the sifted baking soda. The mixture will foam up vigorously—this is exactly what you want! Stir just until the baking soda is fully incorporated (1–2 seconds).
Step 4: Pour and Let It Set
Immediately pour the foamy mixture onto your prepared baking sheet. Do not spread or touch it—this will collapse the bubbles. Let it spread naturally and cool completely, about 1 hour at room temperature.
Step 5: Break Into Pieces
Once fully hardened, use your hands, a knife, or a mallet to break the honeycomb into bite-sized chunks. Store in an airtight container to preserve its crunch.
🧁 Variations
While traditional honeycomb candy is simple and golden, there are fun ways to customize it:
- Chocolate-Dipped Honeycomb: Once broken into pieces, dip the chunks in melted dark, milk, or white chocolate. Let them set on parchment for a delicious treat that mimics a Crunchie bar.
- Salted Honeycomb: Add a sprinkle of sea salt over the hot candy before it cools. The contrast between sweet and salty is irresistible.
- Spiced Honeycomb: Stir a pinch of cinnamon, nutmeg, or cayenne pepper into the sugar mixture before heating for a unique flavor twist.
- Honey Flavor Boost: Swap out some of the corn syrup with real honey for a deeper, more authentic honey flavor.
- Nutty Crunch: Add finely chopped toasted nuts to the hot mixture for added texture and taste.
- Colored Honeycomb: Use gel food coloring added with the baking soda for fun, themed treats (like orange and black for Halloween or red and green for Christmas).
These variations make honeycomb candy endlessly versatile and perfect for gifting or customizing for special occasions.
🔥 Cooking Note
Honeycomb candy might seem intimidating at first, but it’s all about timing and precision. The most critical step is heating the sugar mixture to exactly 300°F (hard crack stage). Too low, and your candy will be chewy. Too high, and it may burn and taste bitter.
Stirring the sugar once it starts boiling can cause crystallization, leading to a gritty texture. Just let it boil undisturbed. If you notice sugar crystals forming on the sides of your pan, you can gently brush them down with a wet pastry brush.
The reaction between the hot sugar and baking soda is fast and dramatic. Make sure to add the baking soda off the heat and stir quickly but not excessively. Overmixing can collapse the bubbles that give honeycomb its texture.
Lastly, humidity can affect the final product. Honeycomb candy absorbs moisture from the air, which can make it sticky and chewy over time. Store it in a dry, airtight container and avoid making it on very humid days if possible.
🍽️ Serving Suggestions
Honeycomb candy is delicious on its own, but here are some creative ways to serve it:
- As a standalone treat in candy bowls at parties or as a festive holiday snack.
- Crumbled over ice cream for a sweet, crunchy topping.
- Used as cake or cupcake decoration—its golden color adds a stunning visual element.
- Dipped in chocolate and wrapped as a homemade gift.
- Tucked into cookie tins or dessert boxes for seasonal gifting.
- Sprinkled over whipped cream-topped drinks like hot chocolate, milkshakes, or lattes.
Whether you enjoy it by the piece or incorporate it into desserts, honeycomb candy offers a delightful texture and flavor that elevates any treat.
💡 Helpful Tips
- Use a Candy Thermometer: Accuracy matters! Reaching exactly 300°F ensures a crisp, non-sticky result.
- Don’t Overmix: Stir the baking soda in quickly and just until combined. Too much stirring will deflate the bubbles.
- Avoid High Humidity: Make honeycomb on dry days, or store it in an airtight container with a silica gel pack to prevent stickiness.
- Prep Everything First: Have your pan lined and baking soda ready before you start heating the sugar.
- Use a Heavy-Bottomed Pot: This ensures even heat distribution and helps prevent burning.
- Don’t Spread the Mixture: Let it flow naturally in the pan. Touching or smoothing it can ruin the structure.
- Sift the Baking Soda: Clumps of baking soda can lead to uneven bubbles or a metallic aftertaste.
- Clean Up with Hot Water: Hardened candy is sticky, but it dissolves easily in boiling water.
These tips help eliminate the common pitfalls and make sure your honeycomb candy is flawless every time.
🌟 Tips for the Best Honeycomb Candy
- Timing is everything remove the pot from heat the second it reaches 300°F.
- Act fast when adding the baking soda, but keep your stir brief and gentle.
- Let it cool completely before breaking rushing this step could leave it chewy instead of crisp.
- Store it smartly use an airtight container, and don’t refrigerate it; cold air adds moisture and ruins the texture.
- Use fresh baking soda expired baking soda won’t react properly and can cause the candy to flop.
- For dramatic height and fluffiness, pour the mixture from a bit higher above the pan so the foam stacks.
- Clean up easily by soaking your pan and utensils in hot water no scrubbing needed!
Master these tips and you’ll be making show-stopping honeycomb candy like a pro.
⏱️ Timing Overview
- ⏱️ Prep Time: 5 minutes
- ⏱️ Cooking Time: 10 minutes
- ⏱️ Total Time: 1 hour 15 minutes (includes cooling time)
🥗 Nutritional Information (per 1 oz serving)
- Calories: 120
- Protein: 0g
- Sodium: 95mg
- Carbohydrates: 30g
- Sugars: 28g
- Fat: 0g
Note: Nutritional values may vary depending on portion size and added toppings like chocolate or nuts.
Related Recipes :
- Pineapple Coconut God Bless America Cake
- Homemade Lavender Ice Cream Recipe
- Best Southern Pimento Cheese Recipe
- Strawberry Truffles Recipe
- Spicy Pickled Eggs Recipe
- Marshmallow Whip Cheesecake Heaven Recipe
❓ FAQs
Can I use honey instead of corn syrup?
Yes, but it changes the flavor and browns more quickly. Watch the temperature closely to prevent burning.
Why is my honeycomb chewy instead of crunchy?
Most likely, the sugar mixture didn’t reach 300°F. Make sure to use a candy thermometer for precision.
Can I double the recipe?
Yes, but use a larger pot and be careful not to over-stir after adding the baking soda.
How long does honeycomb candy last?
Stored properly in an airtight container, it lasts up to 2 weeks. Add a silica gel pack to extend freshness.
Why did my honeycomb collapse?
Overmixing after adding the baking soda or trying to spread it in the pan can deflate the bubbles.
🏁 Conclusion
Honeycomb candy is the perfect blend of fun, flavor, and science. With just a few ingredients and some kitchen chemistry, you can create a golden, crunchy treat that delights both kids and adults alike. Whether you’re enjoying it plain, dipped in chocolate, or crumbled over desserts, this honeycomb candy recipe is sure to become a go-to in your homemade sweets arsenal.
Try it once, and you’ll be hooked not only by the taste but by the wonder of watching sugar turn into something so spectacular.
Happy candy-making!
Print
Honeycomb Candy Recipe
- Total Time: 1 hour 15 minutes (includes cooling time)
Ingredients
- 1 cup granulated sugar
- ¼ cup light corn syrup (or golden syrup)
- 2 tablespoons water
- 1½ teaspoons baking soda (sifted for best results)
- Optional: ½ teaspoon vanilla extract or a pinch of salt
Instructions
Step 1: Line Your Pan
Start by lining a baking sheet with parchment paper or a silicone baking mat. Set it aside but keep it close, as you’ll need to act fast once the candy is ready.
Step 2: Heat Sugar, Syrup & Water
In a heavy-bottom saucepan, combine sugar, corn syrup, and water. Stir gently until the sugar is moistened. Place over medium heat and stop stirring once the sugar has dissolved.
Allow the mixture to boil until it reaches 300°F (hard crack stage) on a candy thermometer. This usually takes about 5–10 minutes. Keep a close eye to prevent burning.
Step 3: Add Baking Soda
Once the mixture hits 300°F, immediately remove it from heat. Quickly and carefully whisk in the sifted baking soda. The mixture will foam up vigorously—this is exactly what you want! Stir just until the baking soda is fully incorporated (1–2 seconds).
Step 4: Pour and Let It Set
Immediately pour the foamy mixture onto your prepared baking sheet. Do not spread or touch it—this will collapse the bubbles. Let it spread naturally and cool completely, about 1 hour at room temperature.
Step 5: Break Into Pieces
Once fully hardened, use your hands, a knife, or a mallet to break the honeycomb into bite-sized chunks. Store in an airtight container to preserve its crunch.
Notes
Note: Nutritional values may vary depending on portion size and added toppings like chocolate or nuts.
- Prep Time: 5 minutes
- Cook Time: 10 minutes
- Category: Dessert
- Cuisine: Americans
Nutrition
- Calories: 120
- Sugar: 28g
- Sodium: 95mg
- Fat: 0g
- Carbohydrates: 30g
- Protein: 0g
Keywords: Honeycomb Candy Recipe