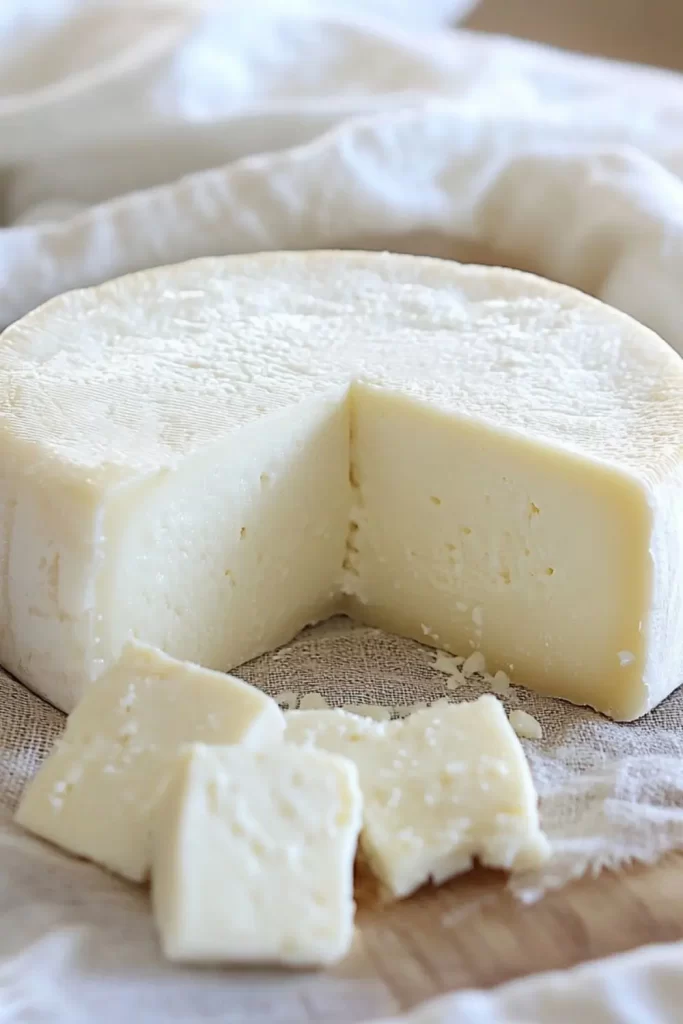
Authentic Queso Fresco Recipe
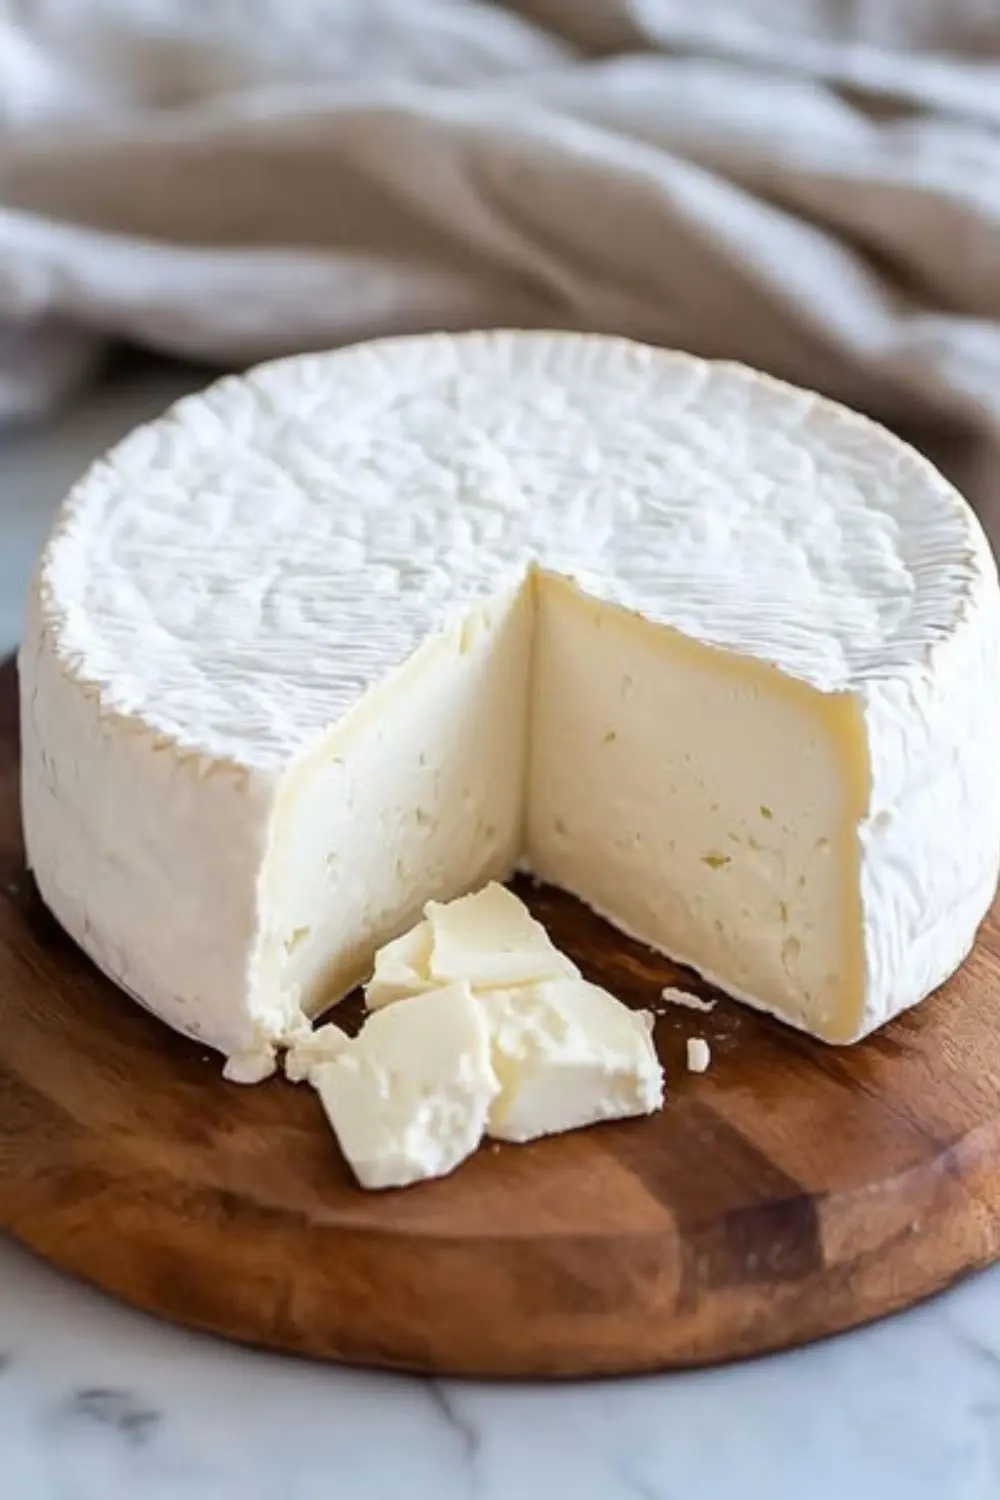
If you’ve ever savored the creamy, slightly tangy flavor of authentic Mexican cuisine, you’ve likely encountered queso fresco a fresh, crumbly cheese that enhances everything it touches. This Queso Fresco Recipe is your gateway to making this delightful cheese at home with minimal ingredients and simple steps. Whether you’re sprinkling it on enchiladas, stuffing it into gorditas, or simply enjoying it with fresh fruit, queso fresco brings a taste of traditional Mexico right into your kitchen.
In this article, we’ll guide you through every step of crafting your own homemade queso fresco from the equipment and ingredients to variations, tips, and serving suggestions.
Let’s dive into the world of fresh cheese!
🛠️ Recipe Preparation Equipment
To make queso fresco at home, you don’t need professional tools just a few kitchen essentials:
- Large stainless steel pot (non-reactive)
- Cooking thermometer
- Cheesecloth or muslin
- Colander or strainer
- Wooden spoon
- Slotted spoon
- Large bowl
- Rubber bands or string
- Measuring cups and spoons
Optional (for pressing):
- Cheese press or a weighted plate
🧂 What Do You Need to Prepare Queso Fresco?
Here are the basic, wholesome ingredients for making traditional queso fresco:
Ingredients:
- 1 gallon (3.8 liters) whole milk (preferably not ultra-pasteurized)
- 1/4 cup white vinegar OR lemon juice (for acidification)
- 1 teaspoon salt (optional or to taste)
- Fresh herbs or chili flakes (optional for flavoring)
👨🍳 How to Make Easy Queso Fresco Recipe Step-by-Step Instructions ?
Follow these steps to create soft, crumbly queso fresco right in your kitchen:
🥄 Step 1: Heat the Milk
Pour the milk into a large pot and slowly heat over medium heat until it reaches 185°F (85°C). Stir gently to prevent scorching.
🥄 Step 2: Add the Acid
Turn off the heat. Slowly pour in the vinegar or lemon juice while stirring gently. You’ll see the milk begin to curdle and separate into curds and whey. Let it sit undisturbed for 10 minutes.
🥄 Step 3: Strain the Curds
Line a colander with cheesecloth and place it over a bowl. Gently ladle or pour the curds into the colander, letting the whey drain out. Let it drain for about 15–20 minutes for soft queso fresco, or up to an hour for a firmer texture.
🥄 Step 4: Season the Cheese
Sprinkle the salt over the curds and mix gently. You can also mix in optional herbs or spices at this stage.
🥄 Step 5: Shape and Press (Optional)
Gather the cheesecloth and tie it with a rubber band. Hang it over a bowl or sink to drain more whey for another 30 minutes. For a firmer cheese, place it under a weighted plate or use a cheese press for 1–2 hours.
🌶️ Variations
One of the joys of queso fresco is how adaptable it is. You can easily create exciting variations to suit different cuisines or preferences. For a herbed queso fresco, mix in finely chopped fresh cilantro, oregano, or chives before shaping. Crushed red pepper flakes or finely minced jalapeños add a spicy touch that’s great for topping tacos or nachos.
If you want a garlic-infused queso fresco, blend in roasted garlic paste for a mellow, savory flavor. To give the cheese a Mediterranean twist, add crumbled black olives and dried thyme. Sweet lovers might even enjoy a dessert-style variation with honey and cinnamon blended into the curds, similar to Middle Eastern cheese desserts.
You can also control the texture of queso fresco by adjusting draining and pressing time. A firmer cheese works better for slicing and grilling, while a loosely drained version is ideal for crumbling over salads and beans. Whether you keep it traditional or put your spin on it, queso fresco’s mild flavor makes it the perfect canvas for creativity.
🧾 Cooking Note
When making queso fresco, the quality of your milk matters most. Whole, non-ultra-pasteurized milk delivers the best results. Ultra-pasteurization can interfere with curdling and leave you with disappointing, small curds. If you have access to fresh, raw milk (and it’s legal and safe in your area), you’ll be amazed by the flavor and yield.
Another critical point is temperature control. Heating the milk too quickly or too high can lead to rubbery cheese or incomplete separation. Use a thermometer to ensure accuracy—this small step can greatly improve your final product.
Acid choice also plays a role. White vinegar results in a clean, neutral flavor, while lemon juice lends a hint of citrus tang. Experiment to find your preference.
Remember, draining time impacts both texture and flavor. Shorter draining yields moist, spreadable cheese, while longer pressing creates firmer slices. Always taste before final shaping—this is your chance to adjust salt or add flavors.
Finally, don’t discard the whey! It’s protein-rich and can be used in baking, smoothies, or as a soup base. Making queso fresco is as much about sustainability as it is about flavor.
🍽️ Serving Suggestions
Queso fresco’s light, tangy flavor and crumbly texture make it an incredibly versatile addition to many dishes. Here are a few ideas to enjoy your homemade cheese:
- Taco topping: Crumble over carne asada, chicken, or veggie tacos for added richness.
- Enchiladas and chilaquiles: Sprinkle on top before serving to balance spicy sauces.
- Salads and grain bowls: Use as a topping for mixed greens, quinoa, or roasted veggies.
- Breakfast: Pair with scrambled eggs or stuff inside breakfast burritos.
- Snacks: Enjoy it plain with fresh fruit, nuts, or drizzled with honey.
- Arepas or gorditas: Use queso fresco as a stuffing or topping for traditional Latin American breads.
Its mild flavor complements bold, spicy, and savory foods, making it an excellent finishing touch or stand-alone snack.
💡 Helpful Tips
- Choose quality milk: Avoid ultra-pasteurized milk for better curd formation.
- Monitor temperature: Use a thermometer and avoid boiling the milk—185°F is ideal.
- Let the curds rest: After acid addition, patience helps form large curds.
- Use clean tools: Sanitize all equipment to prevent contamination.
- Drain properly: Over-draining can make the cheese too dry, while under-draining can leave it too soft.
- Salt to taste: Add salt gradually, especially if using salted dishes.
- Press or not? If you want firmer cheese for slicing, use a gentle press.
- Add herbs last: Always mix in herbs and spices after curds have formed, not before.
- Cool completely before storage: Warm cheese can become too moist in storage.
- Use whey creatively: Try adding it to bread dough, soups, or smoothies—it’s nutritious and flavorful.
Following these tips ensures consistency and improves the flavor of your homemade queso fresco.
🧀 Tips for the Best Queso Fresco
- Use fresh, whole milk for the richest texture and best yield.
- Always add the acid slowly and stir gently to preserve curd size.
- Don’t skip the resting period after curdling—it allows curds to fully develop.
- For firmer cheese, extend draining or apply light pressure.
- Taste your curds before final shaping—you can adjust salt and add herbs easily at this stage.
If your queso fresco is too crumbly, try draining for a shorter period next time. Too soft? Drain longer or press lightly.
Proper temperature, timing, and gentle handling are key to turning milk into delicious queso fresco.
⏱️ Timing Overview
- Prep Time: 15 minutes
- Cooking Time: 30 minutes
- Total Time: 1 hour 15 minutes (including draining)
🔢 Nutritional Information (per 1 oz/28g serving)
- Calories: 80
- Protein: 5g
- Sodium: 100mg
- Fat: 6g
- Carbohydrates: 1g
- Calcium: 150mg
❓ FAQs
Q: Can I use skim milk to make queso fresco?
A: It’s best to use whole milk for optimal curd formation and flavor. Skim milk will yield less and result in a drier cheese.
Q: How long does homemade queso fresco last?
A: It will keep for 5–7 days in the refrigerator when stored in an airtight container.
Q: Can I freeze queso fresco?
A: Freezing is not recommended—it alters the texture. Make fresh batches for best results.
Q: Can I use rennet instead of vinegar?
A: Traditional queso fresco relies on acid like vinegar or lemon juice. Rennet will yield a different type of cheese.
🧾 Conclusion
Making your own queso fresco at home is not only rewarding but surprisingly easy. With just a few ingredients and simple tools, you can enjoy a fresh, versatile cheese that pairs beautifully with everything from tacos to salads. Whether you prefer it soft and crumbly or firm and sliceable, this queso fresco recipe allows full control over the taste and texture.
Take the time to explore variations and serving ideas, and you’ll never look at store-bought cheese the same way again. Fresh, flavorful, and deeply satisfying homemade queso fresco is a culinary tradition worth preserving.