Spicy Tuna Onigiri Recipe
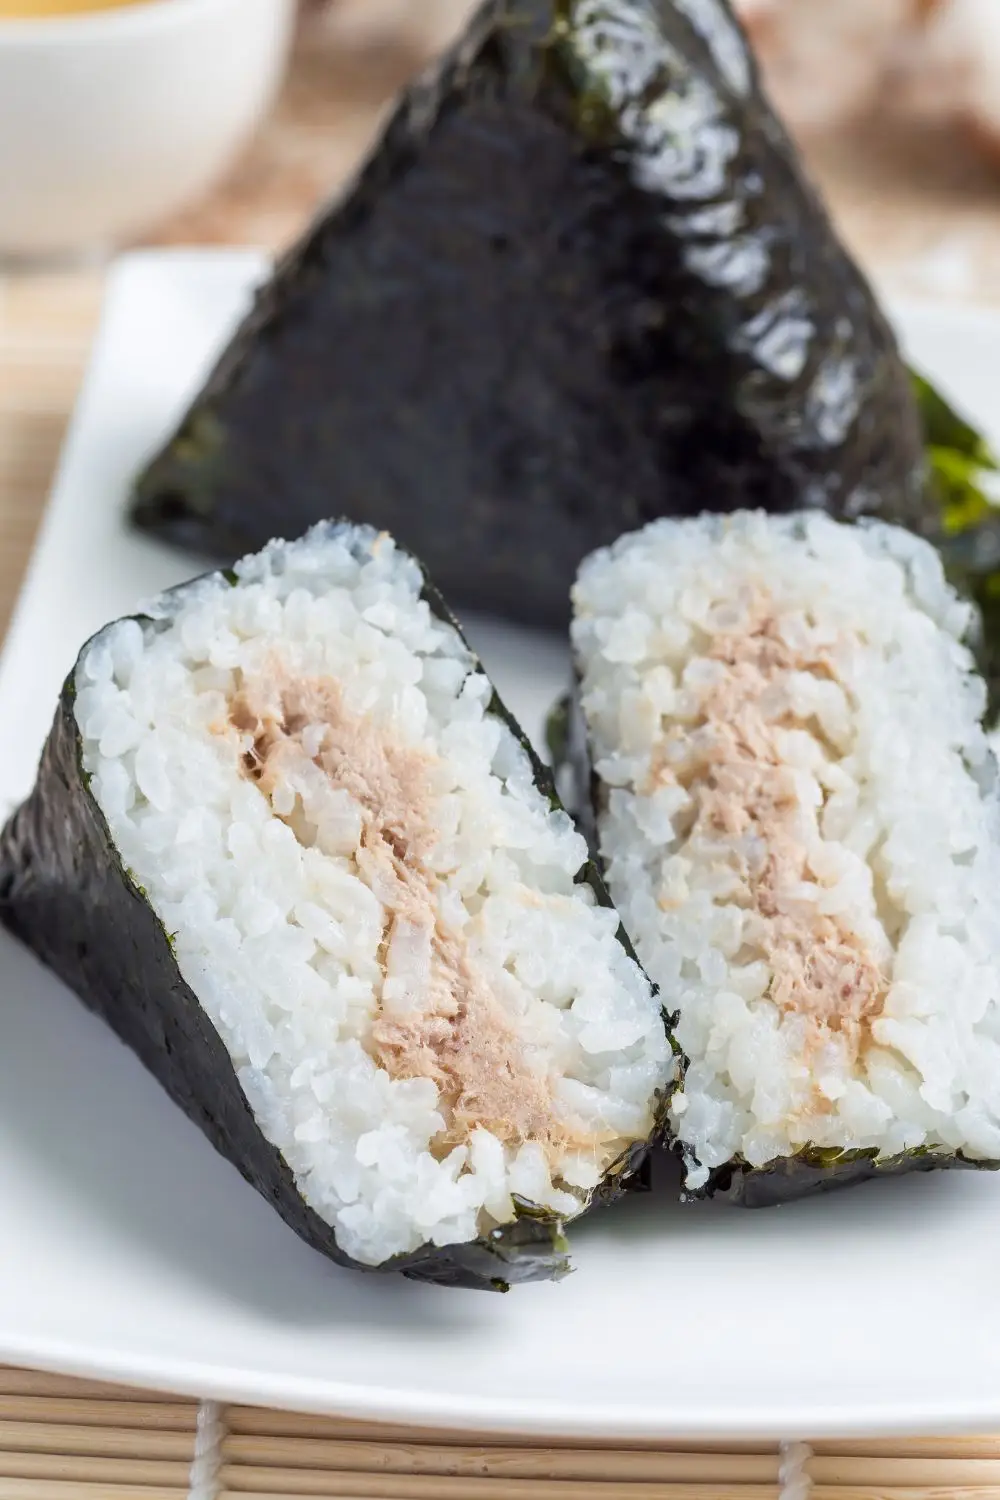
Spicy Tuna Onigiri is a delightful fusion of traditional Japanese rice balls and the bold, zesty flavors of spicy tuna. These savory hand-held treats are wildly popular for their convenience, portability, and crave-worthy taste. Whether you’re familiar with onigiri from Japanese cuisine or just exploring new snacks, this recipe brings a unique twist with a spicy, creamy tuna filling wrapped in seasoned rice and nori.
Perfect for meal prep, lunchboxes, road trips, or quick bites, Spicy Tuna Onigiri is a versatile dish that can be customized to your heat preference and flavor profile. It blends simplicity with excitement mild, fluffy rice contrasted with the punch of chili-kissed tuna and creamy mayo.
Let’s dive into everything you need to know to create the ultimate Spicy Tuna Onigiri at home!
❤️ Why You’ll Love This Recipe?
- Easy and quick: Requires simple pantry staples and less than an hour of prep and cook time.
- Portable: Great for packed lunches, hikes, picnics, or meal prep.
- Customizable: Adjust the spice level, rice seasoning, or fillings to your liking.
- Authentic meets modern: Combines traditional Japanese onigiri with the bold kick of spicy tuna.
- Gluten-free & dairy-free options: Easy to modify for dietary needs.
🛒 What You’ll Need to Prepare Spicy Tuna Onigiri ?
Here’s a list of essential ingredients for making flavorful Spicy Tuna Onigiri:
For the Rice:
- 2 cups Japanese short-grain rice (sushi rice)
- 2 ½ cups water
- 2 tablespoons rice vinegar
- 1 tablespoon sugar
- 1 teaspoon salt
For the Spicy Tuna Filling:
- 1 can (5 oz) tuna in water or oil, drained
- 2 tablespoons Japanese mayonnaise (Kewpie preferred)
- 1 tablespoon Sriracha (adjust to taste)
- ½ teaspoon soy sauce
- ½ teaspoon sesame oil
- 1 teaspoon chopped green onions (optional)
- Pinch of salt
For Assembly:
- Nori sheets (cut into strips or squares)
- Salted water (for handling rice)
- Toasted sesame seeds (optional, for garnish)
👩🍳 How to Make Spicy Tuna Onigiri – Step-by-Step Instructions ?
Step 1: Cook the Rice
Rinse the rice under cold water until the water runs clear. Combine with water in a rice cooker or pot and cook according to package instructions. Once cooked, allow it to cool slightly.
In a small saucepan, heat rice vinegar, sugar, and salt until dissolved. Pour this over the rice and mix gently with a wooden spoon or paddle. Let it cool enough to handle.
Step 2: Prepare the Spicy Tuna Filling
In a bowl, combine the drained tuna, Kewpie mayonnaise, Sriracha, soy sauce, sesame oil, and green onions. Mix thoroughly until creamy and well-blended. Taste and adjust spice level if needed.
Step 3: Shape the Rice Balls
Prepare a bowl of salted water to wet your hands before handling the rice (this prevents sticking).
Take about ⅓ to ½ cup of rice and flatten it slightly in your hand. Add 1–2 teaspoons of the spicy tuna mixture to the center. Fold the rice over the filling and gently mold it into a triangle or oval shape, sealing the edges.
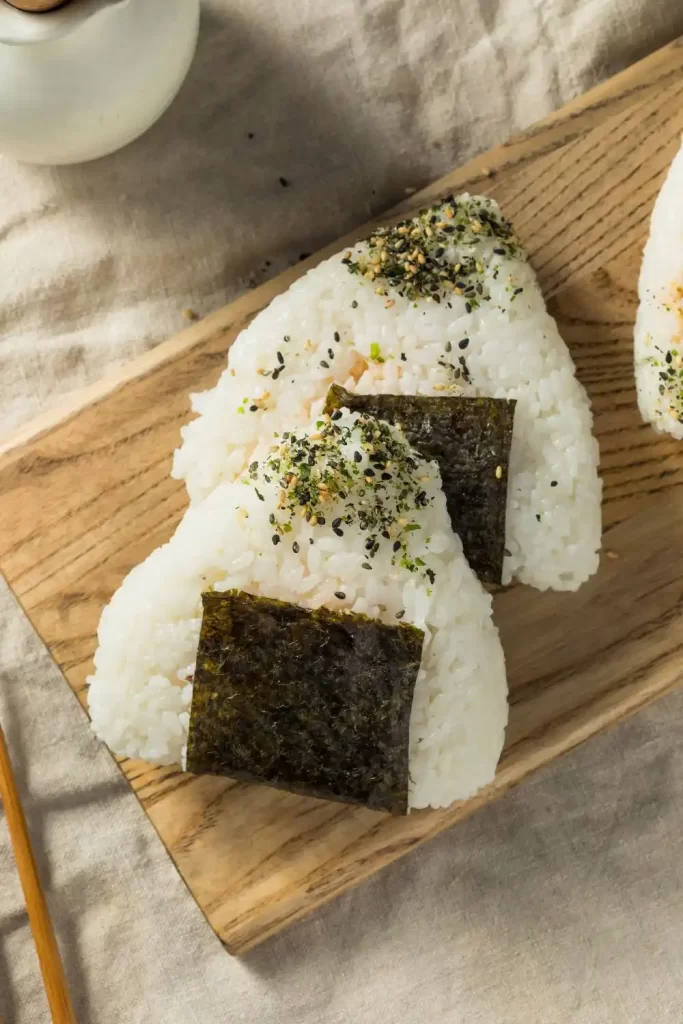
Step 4: Wrap with Nori
Wrap each rice ball with a strip or square of nori. If you’re eating the onigiri later, wrap the nori separately and assemble before eating to prevent sogginess.
Step 5: Garnish and Serve
Optionally, sprinkle the finished onigiri with toasted sesame seeds or furikake. Serve warm or chilled. Enjoy!
🔄 Variations
Spicy Tuna Onigiri can be endlessly customized to suit different preferences and spice tolerances. For a milder version, reduce or omit the Sriracha and add more mayonnaise for a creamy texture. For heat lovers, include finely chopped chili peppers or a dash of hot chili oil for an extra kick.
Instead of tuna, try cooked salmon mixed with the same spicy mayo blend for a similar taste with a slightly different texture. Another option is using canned chicken or even mashed chickpeas for a vegetarian twist. For those avoiding mayonnaise, Greek yogurt or avocado can act as creamy substitutes.
You can also infuse the rice with furikake seasoning or chopped herbs to add complexity and visual appeal. For a cheesy spin, insert a small cube of mozzarella or cheddar in the center of the rice ball.
Experiment with shapes—triangles are traditional, but balls or cylindrical forms also work well, especially for kids or party platters.
🍳 Cooking Notes
Cooking perfect onigiri starts with mastering the rice. Japanese short-grain rice is essential—it provides the right stickiness to hold the shape. Rinsing the rice before cooking is critical to remove excess starch, which can make the rice gummy. Use a rice cooker for consistent results or a heavy-lidded pot for stovetop cooking.
When seasoning the rice, avoid overmixing or smashing the grains. A gentle folding motion maintains the texture and appearance.
Make sure your hands are clean and slightly dampened with salted water when shaping the onigiri. This prevents sticking and helps season the outside of the rice slightly.
Don’t overfill the center or the rice ball will fall apart. A teaspoon or two of filling is perfect. Gently but firmly mold the rice around it, sealing it completely.
Nori adds flavor and structure but can become soggy over time. For best results, wrap it just before eating if making ahead.
Lastly, keep Spicy Tuna Onigiri refrigerated if storing. While best eaten the same day, they can be kept for up to 2 days in an airtight container in the fridge.
🍽️ Serving Suggestions
Spicy Tuna Onigiri is a flexible dish that can be served warm, at room temperature, or chilled—making it a great addition to bento boxes or picnic baskets. Pair them with a bowl of miso soup or a light side salad for a well-rounded lunch.
They also shine as appetizers at parties or snacks during movie nights. Include dipping sauces like soy sauce, spicy mayo, or ponzu for added variety.
For a more filling meal, serve alongside edamame, seaweed salad, or a light noodle dish like soba or udon.
If you’re hosting a themed Japanese night, offer Spicy Tuna Onigiri with other onigiri varieties such as pickled plum (umeboshi) or salmon. Their fun shape and bold flavor make them a hit with both kids and adults.
🧠 Helpful Tips
- Use short-grain rice: It’s the key to achieving the perfect sticky texture for shaping.
- Cool the rice slightly: Handling piping hot rice is tough; let it cool enough so it’s safe to touch but still warm for easier shaping.
- Salt your hands: A light dip in salted water prevents rice from sticking and seasons the exterior subtly.
- Don’t overfill: A little filling goes a long way. Too much can break apart the rice ball.
- Shape gently: Press firmly but not too hard. You want the rice to stick together without becoming mushy.
- Wrap nori at the last minute: Prevents soggy seaweed if making onigiri ahead of time.
- Add sesame seeds or furikake: For extra texture, crunch, and visual flair.
- Refrigerate in airtight containers: Store onigiri in plastic wrap or containers if not eating immediately.
- Eat within two days: Tuna-based fillings are best consumed quickly.
- Use plastic wrap for easy shaping: Especially if you’re a beginner—mold the rice with plastic to avoid mess.
🏆 Tips for the Best Spicy Tuna Onigiri
To make the best Spicy Tuna Onigiri, start with high-quality ingredients. Use Japanese short-grain rice and Kewpie mayo for authentic flavor and texture. When mixing the spicy tuna, taste the filling before stuffing to ensure the perfect balance of heat and creaminess.
Handle the rice gently over-pressing will make it dense and dry. Use just enough pressure to hold the shape. Dip your hands in salted water often to prevent rice from sticking and to lightly season the outer layer.
For the most satisfying bite, place the filling right in the center and seal it fully with the rice. Don’t forget to wrap the nori just before serving for the perfect crunch.
Lastly, keep your hands clean and organized with a prep station it’ll make the entire process smoother, especially when making multiple onigiri.
⏱️ Timing Overview
- Prep Time: 15 minutes
- Cooking Time: 20 minutes
- Total Time: 35 minutes
🧾 Nutritional Information (Per Onigiri)
- Calories: 180 kcal
- Protein: 7 g
- Sodium: 320 mg
❓ FAQs
Q: Can I use regular rice instead of Japanese short-grain rice?
A: It’s not recommended. Japanese short-grain rice has the right stickiness to hold the shape. Regular rice may fall apart.
Q: Is it okay to make spicy tuna onigiri in advance?
A: Yes, but for best texture, wrap the nori separately and refrigerate for up to 2 days.
Q: Can I make these without mayonnaise?
A: Absolutely. Try Greek yogurt, mashed avocado, or even silken tofu as a creamy binder.
Q: Are spicy tuna onigiri spicy enough for chili lovers?
A: The spice is moderate, but you can adjust it by adding more Sriracha, chili flakes, or chili oil.
Q: Can I freeze onigiri?
A: You can freeze them without nori. Reheat in the microwave and wrap with fresh nori before eating.
🔚 Conclusion
Spicy Tuna Onigiri is a delicious marriage of bold flavors and traditional Japanese comfort food. These portable rice balls deliver creamy, spicy tuna in every bite wrapped in seasoned rice and crisp nori for a snack or meal that satisfies any craving. Whether you’re meal-prepping, planning a picnic, or looking to spice up your lunchbox, this easy recipe is a winner.
Once you master the basic technique, you can experiment endlessly with fillings, spice levels, and toppings. From casual snacking to elegant appetizers, Spicy Tuna Onigiri brings a burst of umami, texture, and spice to your table.
Make a batch today and experience the joy of crafting your own homemade Japanese rice balls with a fiery twist! 🍙🔥